Bubble Pizza - Step by Step
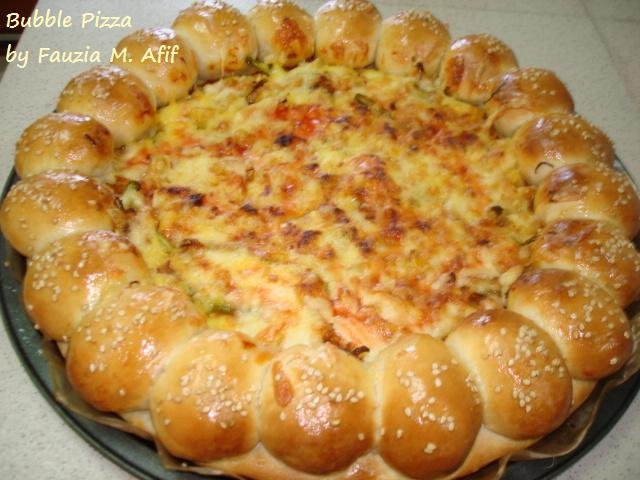
The WOW factor alone that you would get from this gorgeous pizza is enough, but the taste is even more incredible. All the bubbles on the border of the pizza are stuffed with cheese, so every bite is a burst of flavour.
Servings 6 people
Ingredients
Ingredients for Pizza Dough
- 5 cups all-purpose/plain flour
- 1 1/2 cups warm water
- 8 tbsp oil
- 2 tbsp milk powder
- 2 level tbsp instant yeast
- 1/4 tsp baking powder
- 1 tbsp sugar
- 2 tsp salt
Other Ingredients
- Pizza Sauce recipe link given below
- Pizza Toppings recipe link given below
- 2 cups mozzarella & cheddar cheese grated
- 1 egg yolk beaten with 1 tsp milk
- sesame seeds
Instructions
- First, prepare the pizza sauce and toppings using these recipes:Pizza SaucePizza Toppings or Spicy Chicken ToppingNext, prepare the Pizza DoughMix all the dry ingredients and the oil, then slowly start adding the warm water/milk a little at a time. Get it to a soft dough, the softer the better, knead it very well for at least 8 minutes or more if possible.Dab a touch of oil all over the dough, then cover it and place it somewhere warm. Leave it to rise to double its size, takes about 30 minutes to an hour depending on the weather.
- Once risen, punch it down, give it a quick knead and then divide the dough into 2 equal parts.

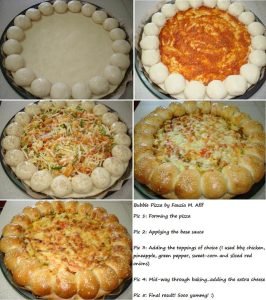
- Roll half of the dough to about 12″, then place it on a greased pizza tray.Divide the second part of the dough into small balls, fill each one with cheese of your choice, I used some grated mozzarella. Seal the balls well and place them all around the border of the pizza.Lightly cover the pizza and let it sit for about 15 minutes.When about ready to bake, take a knife and poke small slits a few times all over the base of the pizza to prevent it from swelling up during baking.Preheat the oven to 180 CSpread the pizza sauce, sprinkle some cheese, and then add toppings of your choice. Sprinkle some more cheese on top. Then brush the balls on the border of the pizza with the beaten egg and sprinkle sesame seeds.Bake for about 30 minutes or until the pizza is well cooked and golden. You can first place it on the lower rack for about 10 minutes, then bring it up a notch to the centre rack and continue baking until done.Serve! 🙂


A.alkm..can i put foil underneath instead of da one you put?kip up d gud wak..shukran
W/Salaam, yes you can. Thanks!
assalamu alaikum, how do you get the dough to stay on the edges because my dough is really stretchy so just shrinks back in. Also is there an easy way of making a pizza round as i am not good at rolling. thanks for this recipe! x
W/Salaam, make sure you knead the dough well, and then before rolling it out, let it rest a little bit first so that it doesn’t spring back when rolled.
assalamualykum mashaallaah am impressed keep it up
reaily nice
hi fauzia
i saw yr so many recepies in yr site and i m impressed.
today i am making this bubble pizza and i changed it a bit.in bubbles i insert gola kabab.and i put grilled chicken on the pizza top with veges.it comes too good.u can try this.wht is think these bubbles comes dry and empty from inside so i changed it w/o yr permission.:)
try it like that. u will love it.
love…Mina
Salam…made this pizza looked lovely… but when we went to eat it, it got stuck to the grease proof paper. Also the pizza turned crumbly..don’t know what happened….
W/Salaam, did you grease the paper before laying out the dough on it? Not sure about the crumbly texture though, that could have something to do with the kneading. 🙂
Hi, i have a question, the cups you use when measuring your ingredients, are they the same as the regular measuring cups?
Hi, yes…here are my measurement conversions for your reference: My Measurements
hi i wanted to ask that i dont have instant yeast so can use the normal yeast n how ?
Hi, yes you can use dry yeast. Read this note on how to activate it: Yeast
your foods tastes yummy!!!cant wait to try all
rily nice luv it
Really verynice n super tasty , as my grand son said , its taste in mouth till sleeping time n want to have again in break fast , thank u n love u .
how many pizzas does this make?
One.
salaams instead of using all purpose flor can we use plain flour such as mcdougalls ? as i cant seem to get hold of all purpose flour
kind regards
W/Salaam, AP flour is the same as plain flour actually.
AslamaAlaikum. My dearest
AslamaAlaikum. My dearest sister I need ur help regarding the oven.plz help. I just bought an very expensive oven but I just can’t get it. I specifically bought a fan assisted electric oven just as u mentioned somewhere in ur comments. Yes I read each n every comment under all the recipe. But in the oven booklet it says for baking use the top rods and for broiling etc use the lower rods. Now when I use the top rod only the cookies or cake or pizza is undercooked from the bottom n if I use the bottom rods things get burned from bottom n not get golden from top. Now, the most confusing part is when I switch both the rods the oven go into sleeping mode after every 4 to 5 mints. Then switch on then off n it goes on. Fauzia plzz I just want to knw when baking which rods should be used top or bottom. And is it normal for oven to on n off when both rods r used. Plzz plzz I just want a little valuable advise from ur great experience. Much love. And lots n lots of prayers for ur n ur family happiness.
W/Salaam. About the rods that
W/Salaam. About the rods that need to be switched on, my oven works differently (I don’t have to switch on various rods at any time) but I believe for ovens like what you are using, start with the bottom one and then midway turn on the top. Accordingly see how the results are and adjust. I wish I could be of more help but have not had any experience with that type of oven. You could try calling the dealer where you bought the oven and find out from them how to adjust/use it. 🙂