Flower Buns - Step by Step
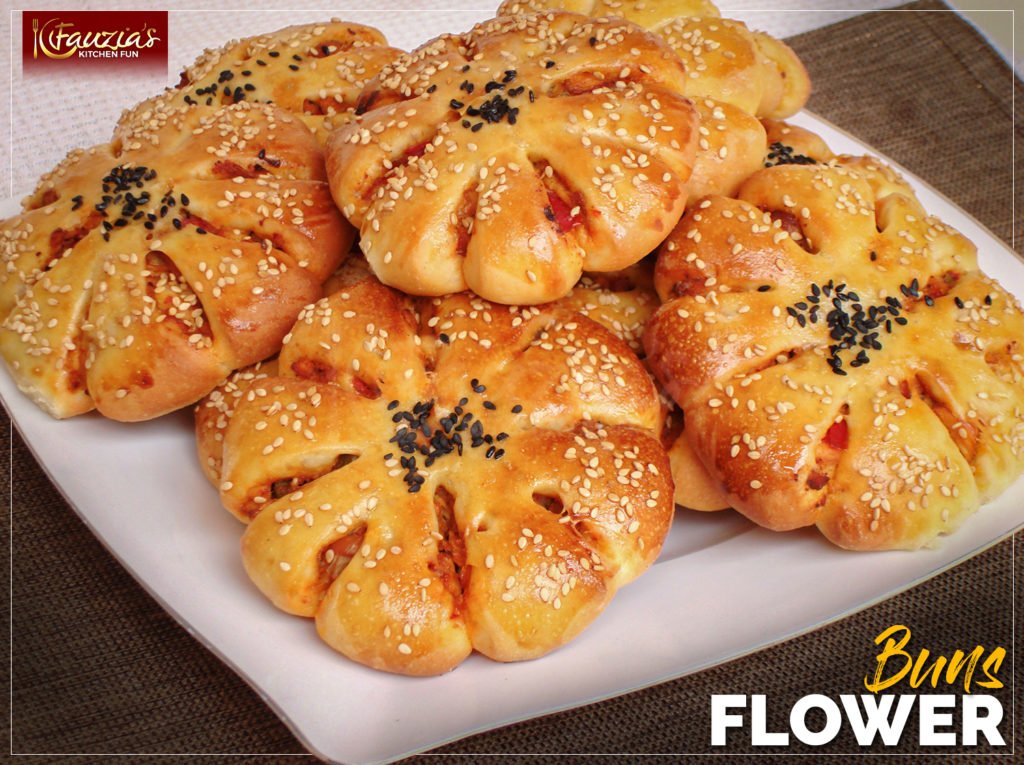
These gorgeous flower shaped buns are truly spectacular, and they taste just as amazing as they look!! The best thing about them is that you can use any filling that you prefer inside. In this case, I have used my fantastic shredded chicken filling, but they work just as well with any of my other fillings found HERE. For a cheesy/pizza flavoured twist, you could use my cheesy chicken filling.
Servings: 18 Rolls
Method
- First, prepare your filling of choice. I used THIS filling, but any you like will work. Check through the fillings folder for options.Sieve the flour, then add milk powder, sugar, yeast and salt. Then add the oil, melted butter/margarine and the egg, and mix together. Now add all the milk. Start kneading together and gradually add the water a little at a time. You may not need to use all the water, so add it sparingly until your dough comes together and is nice and soft. Knead for a good 8-10 minutes. The more you knead the dough, the softer the buns will be.Touch a bit of oil with your fingertips and apply all over the ball of dough. Cover in a bowl and set aside for 40 mins to an hour for it to double in size.

- Punch it down, and divide the dough into 15-18 balls, depending on the size of buns you would like.
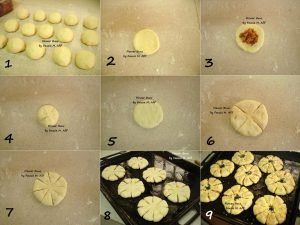
- (STEP 1) Gently roll out each piece of dough to about the size of your palm.
- (STEP 2) Add about a tablespoon or two of filling in the centre.
- (STEP 3) Pull up the edges of the rolled out dough and pinch together to firmly seal the filling within.
- (STEP 4) Turn the filled dough ball over and gently flatten, first with your hand and then very gently with a rolling pin to widen it a little bit.
- (STEP 5) Make 4 slits as shown in the step by step image, either using a pizza cutter or sharp knife or even a pair of kitchen scissors.
- (STEP 6) Make 4 more slits between the previous slits to make a total of 8 slits all together.
- (STEP 7) Place the buns on an oiled tray, cover with a light cloth and let them rise for about 20 minutes to half an hour.
- (STEP 8) Brush each bun with beaten egg and then sprinkle some sesame seeds all over. I used black sesame seeds for the centre of the bun and white ones for the ‘petals’.
- (STEP 9) Bake in a preheated 180 C oven for about 20 minutes or until golden. Remove and serve. These buns freeze well for up to 4 weeks.
- Enjoy! 🙂


Hi Fauzia,
Can I use this recipe on stove top???will it give me similar effect?
Yes you can. Results will still be good but the browning is better when baked in an oven due to heat from the top as well as all around.
Salam, really excited to try these – do I freeze them before baking or after baking? Thank you.
W/Salaam, freeze them after baking.