

Servings : Makes 16 Buns/Rolls
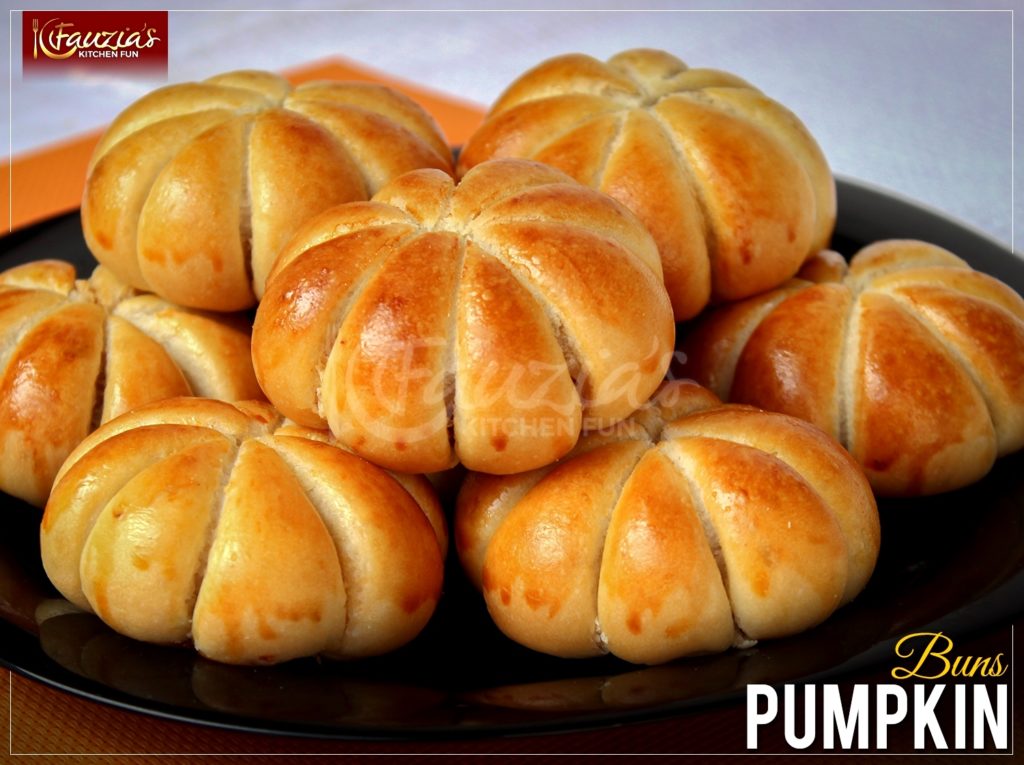
These super cute soft little pumpkin-shaped buns are truly spectacular looking and fairly easy to pull off once you get the hang of how to shape them. They can hold a filling in the centre (like mine are) or can be left without a filling and served as dinner rolls to accompany your meals.
Dough Ingredients
- 3/4 cup milk (150 ml)
- 3/4 cup water (150 ml)
- 3/4 tbsp instant yeast
- 1 tbsp sugar
- 2 tbsp milk powder
- 1/3 cup vegetable oil (70 ml)
- 2 tbsp plain yoghurt (optional)
- 2 tsp salt
- 3 1/2 to 4 cups all purpose flour
Other Ingredients
- Filling to stuff the buns (options given in the instructions below)
- 16 of baking string, each approximately 32 inches long
- 1 egg plus 1 tsp milk (for egg wash)
- some butter (for brushing buns after baking)
Instructions
Please refer to the step by step images below:
If you plan to fill the buns, you can find options in THIS folder.
THIS is the filling I used. (PIC 1)
You can keep them plain without any filling and serve them as dinner rolls too.
If you plan to fill the buns, be careful not to overfill them as this may cause the string to cut through the dough and expose the filling inside during baking. Also, do not use an overly wet filling.
Put the strings in a small bowl and coat them lightly with some cooking oil. This will prevent them sticking too much to the bun during baking and will make it easier to pull them out after baking. (PIC 2)
Next, prepare the Dough:
Mix the milk and water in a pan and warm slightly, take care not to overheat.
In a large bowl, pour in the water and milk mixture, and then sprinkle in the yeast and sugar. Cover and set aside for about 10-15 minutes until the yeast blooms and becomes puffy to indicate that the yeast is activated.
Add in the oil and yoghurt, mix with a spoon. Then add the milk powder, salt and gradually add in 3 cups of flour while stirring. Keep adding the rest of the flour a little at a time until the dough comes together. You may need between 3 and a half up to 4 cups of flour but be careful not to add the last cup all at once.
Turn the dough out onto a lightly floured surface and knead well for about 5-6 minutes or until the dough is smooth, soft and elastic.
Lightly coat the ball of dough with oil and put it back into the bowl, cover and allow the dough to rise to double its size, roughly 30-60 minutes depending on how warm or cold your kitchen is. (PIC 3)
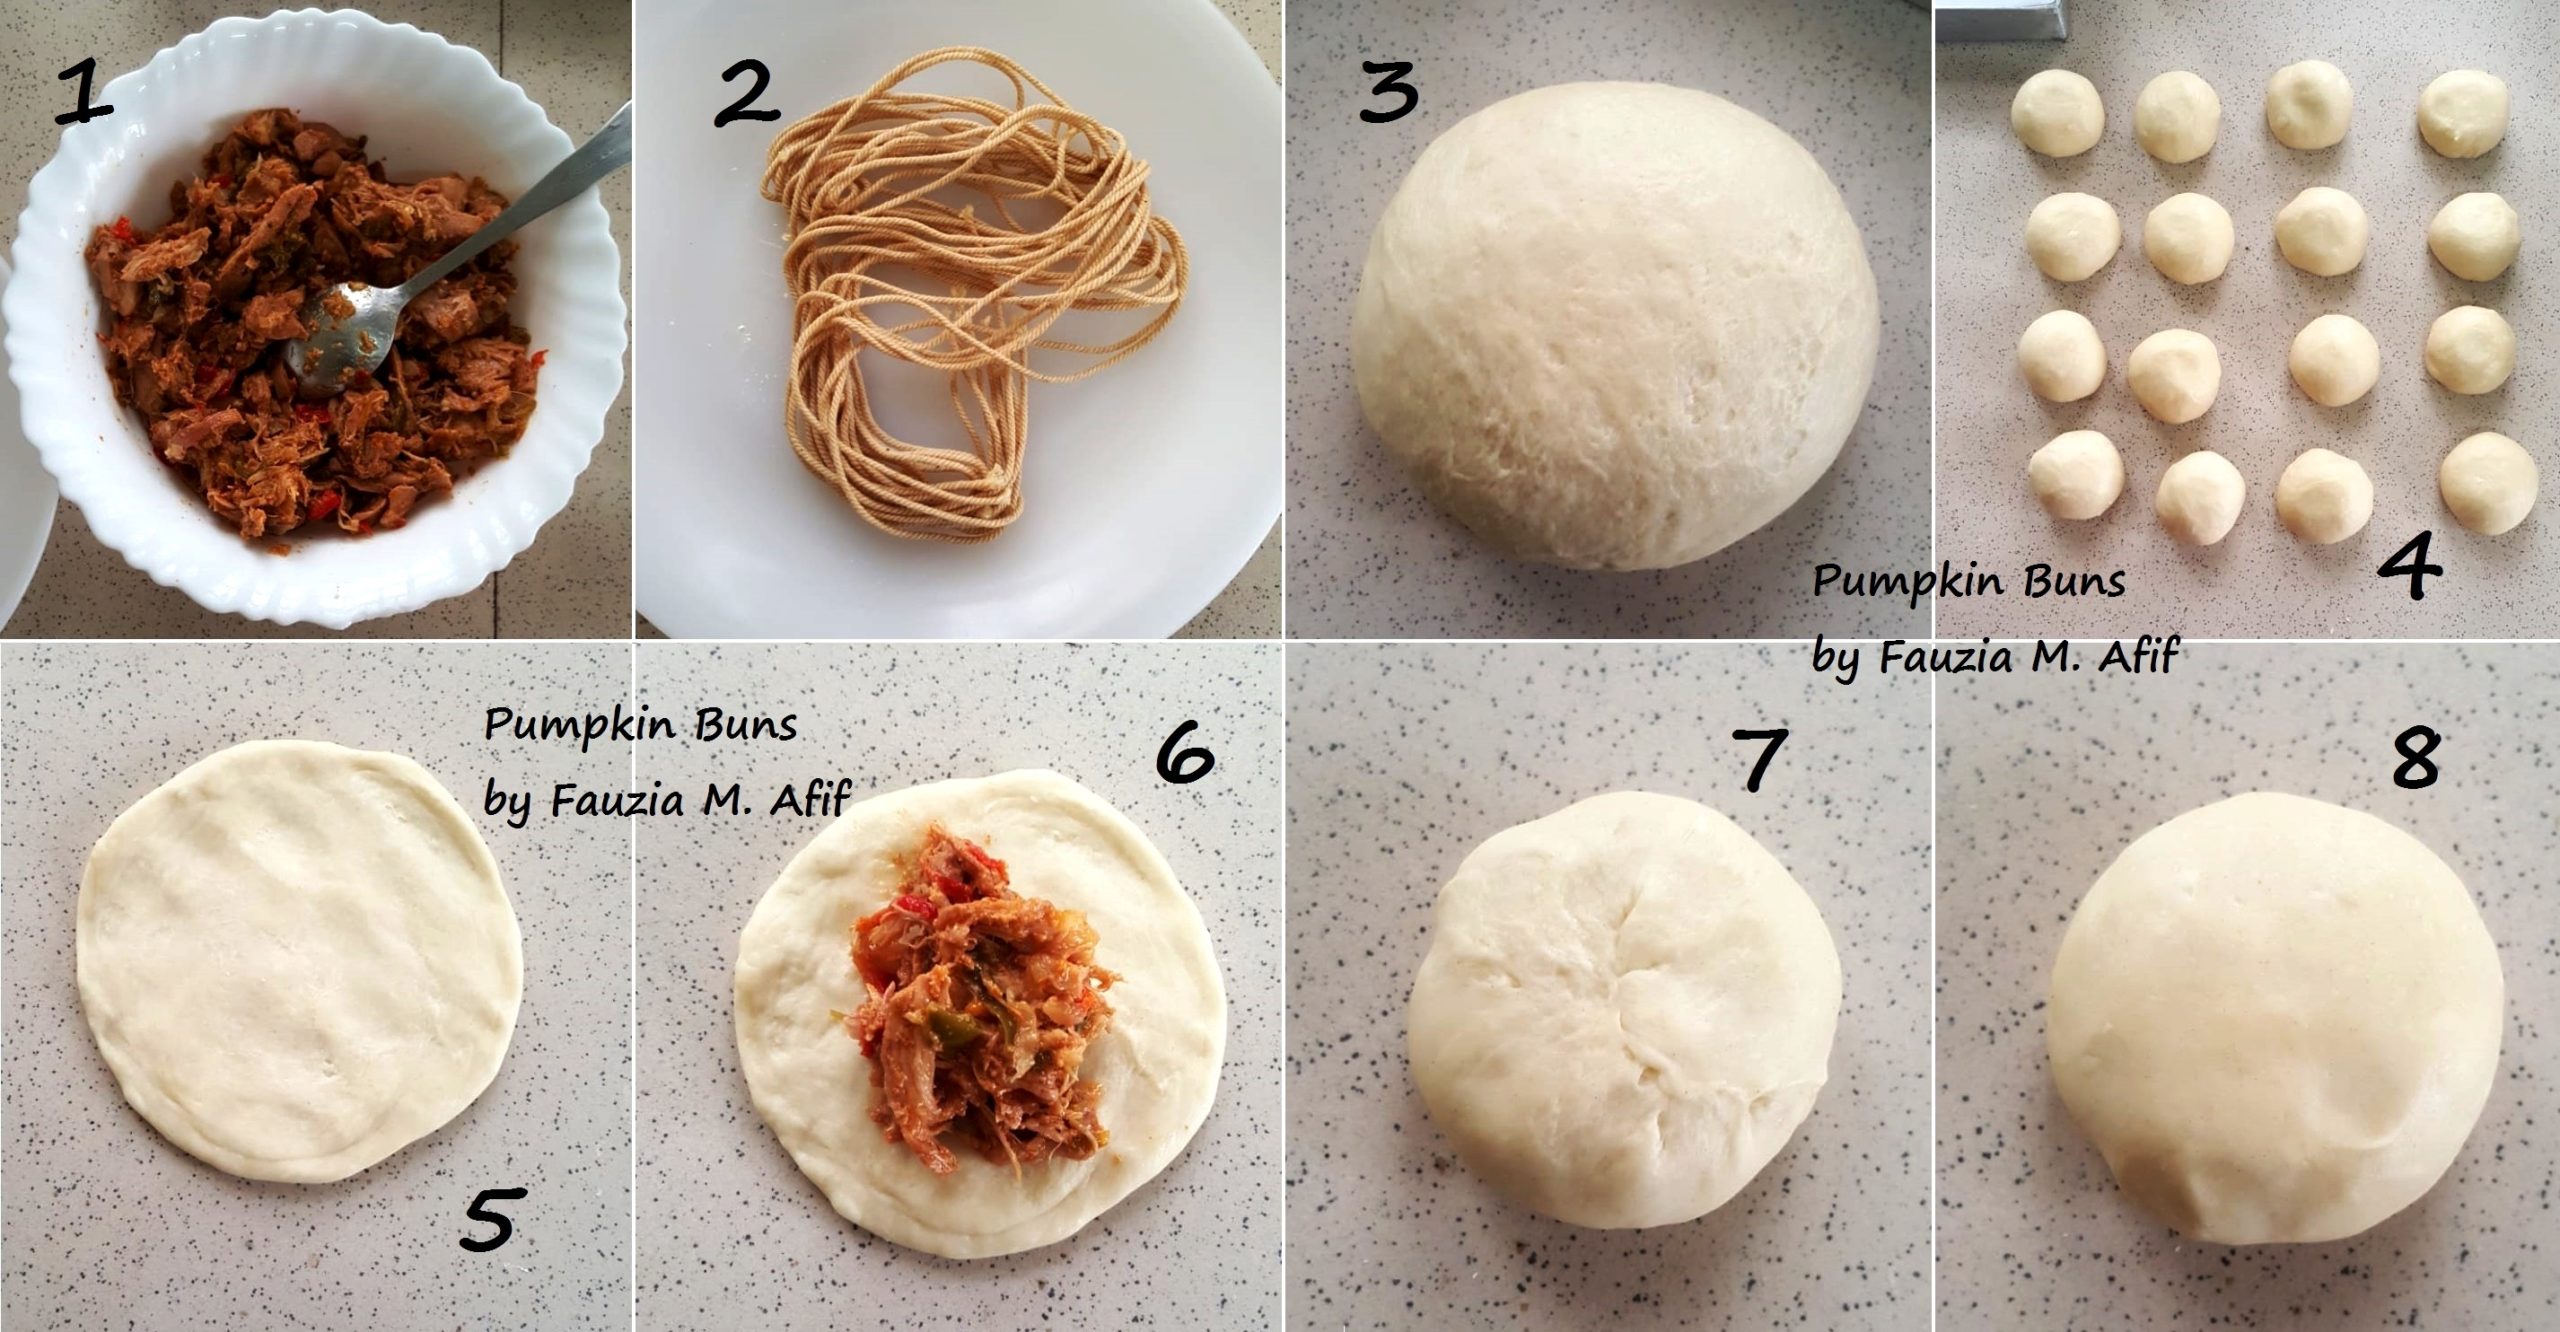
Section the dough into 16 pieces and shape them into small balls. (PIC 4)
Take each ball of dough and flatten it out. (PIC 5)
Add some filling to the centre. (PIC 6)
Gather the sides and bunch them up, pinch the dough to seal and enclose the filling in the centre of the dough, forming a filled ball of dough. (PIC 7)
Turn the ball over so that the smooth side is now on top. (PIC 8)
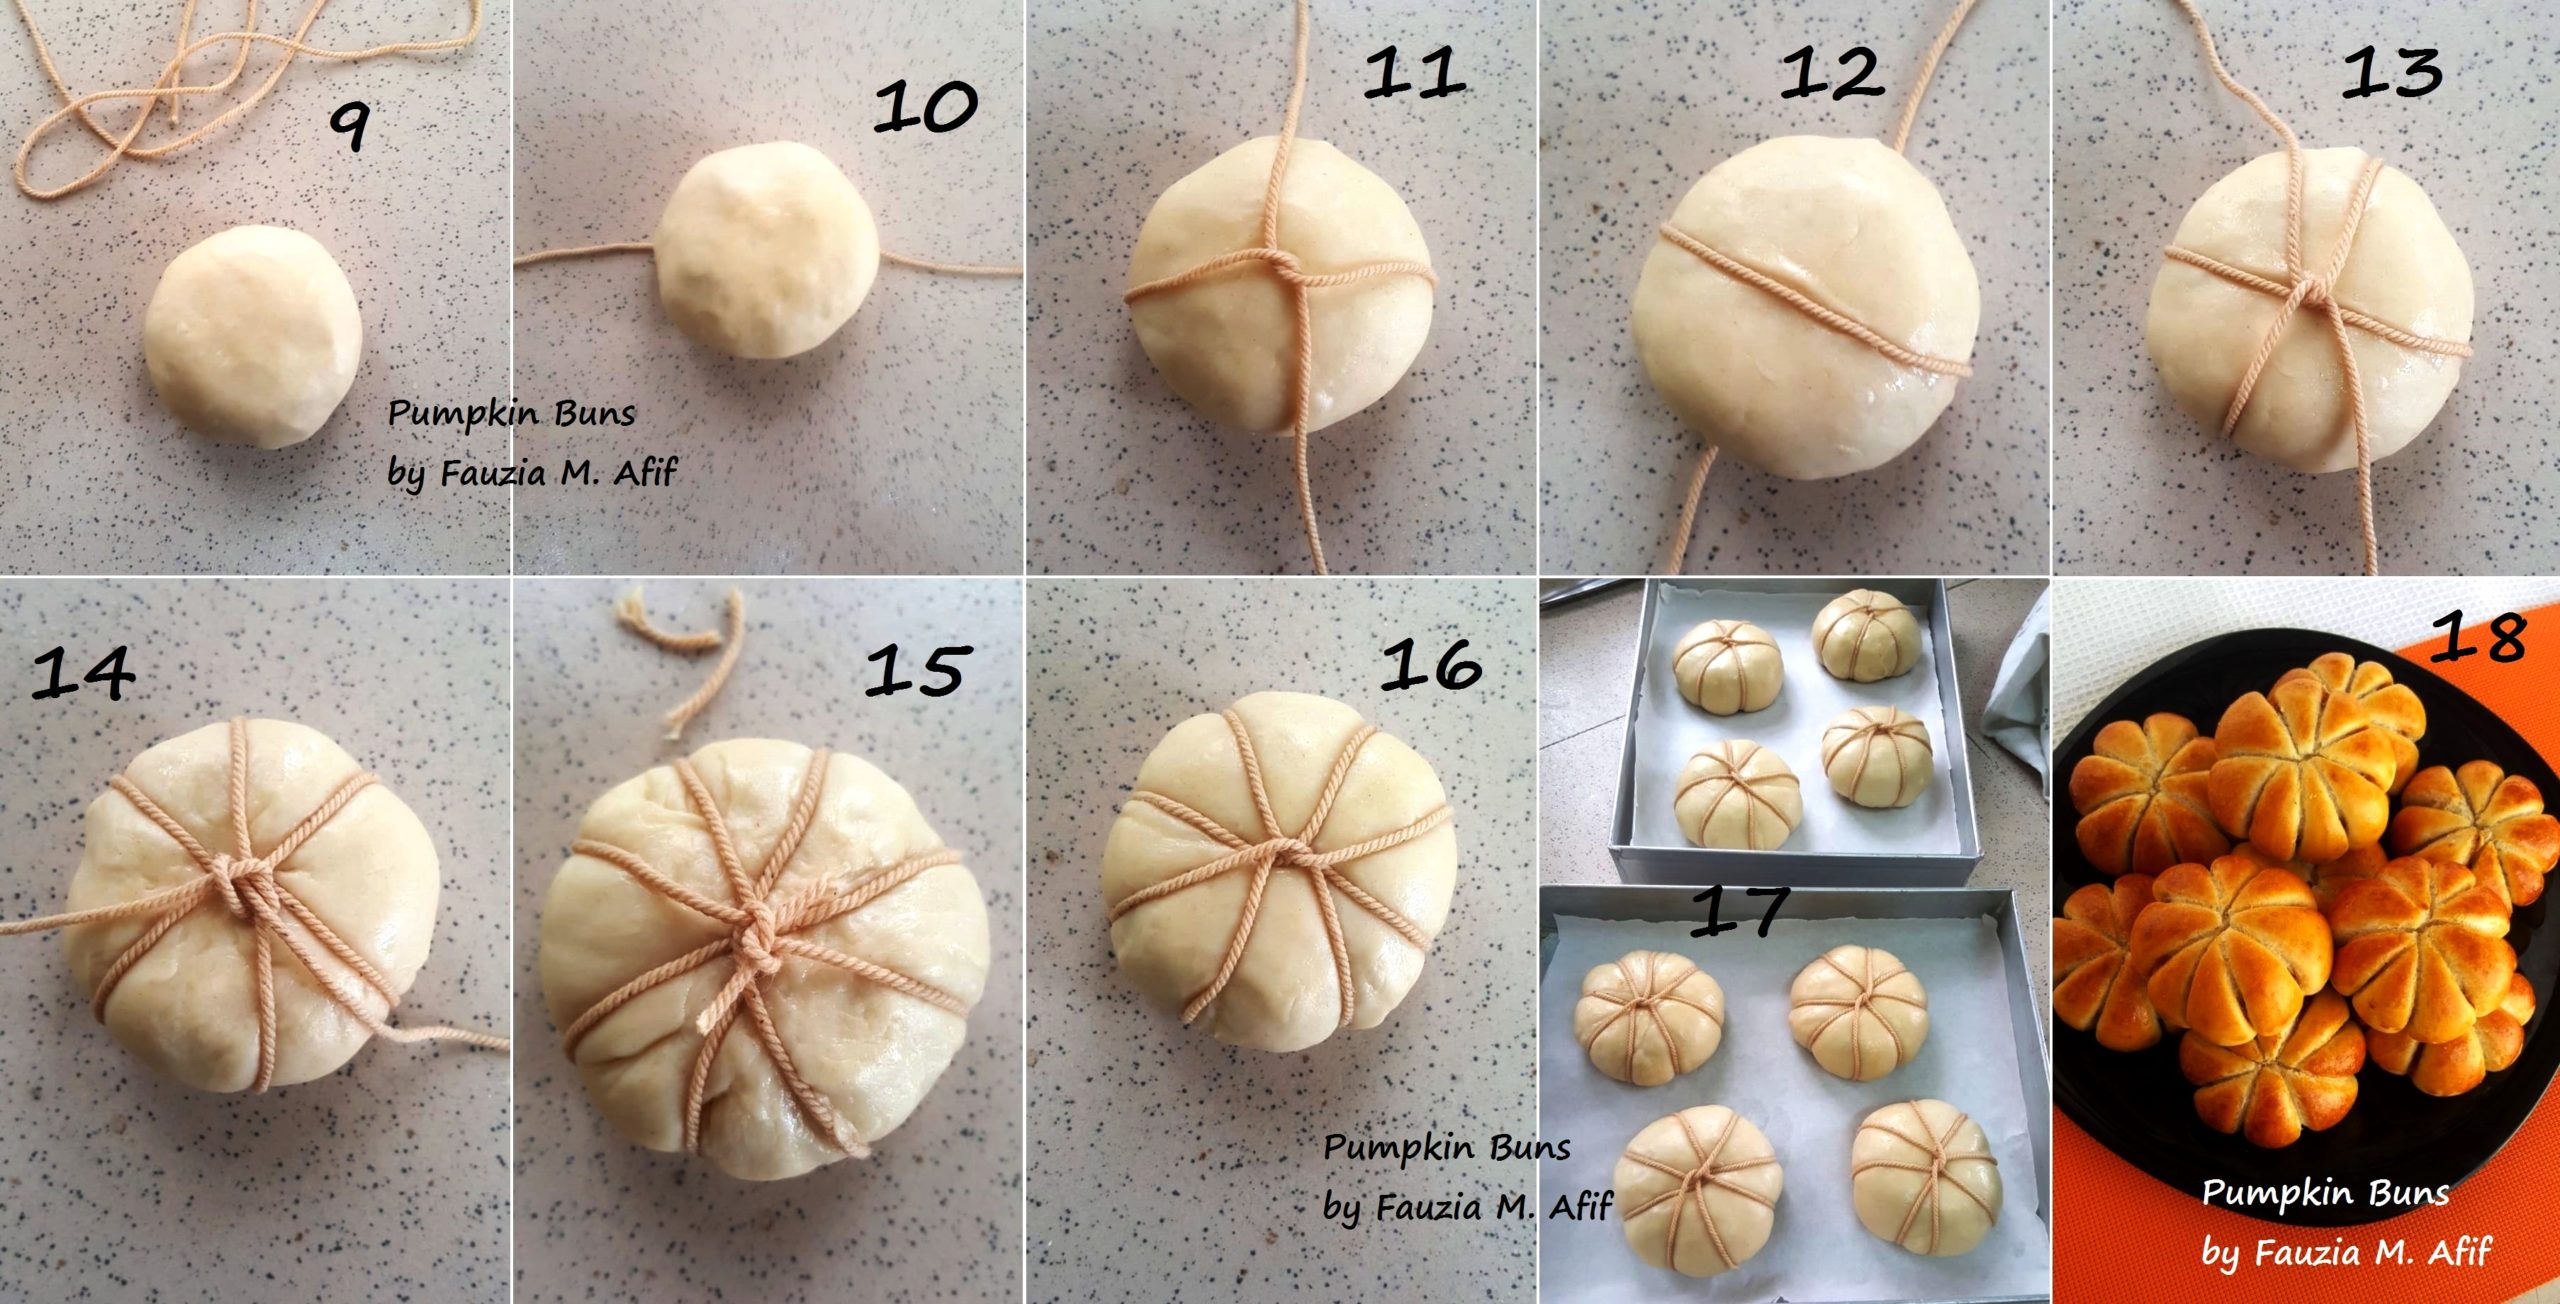
Take one of the oiled strings and place it under the ball of dough. (PICS 9 and 10)
Bring the ends together and make a twist knot on top. (PIC 11)
Turn the ball of dough over, wrap the string around and make another twist knot on the other side. (PIC 12)
Keep going until the ball has been tied into 8 sections. Try not to tighten the string, maintain a light hand as you twist and turn the string around the ball of dough. (PICS 13 and 14)
Once done, if you have any excess, use a scissor to cut it off. (PIC 15).
Turn the prepared ball over so that the knot is now at the bottom and you have a neat top. (PIC 16)
Place the prepared buns/rolls onto a greased or lined tray and cover them to rise for about 20 minutes. (PIC 17)
Brush them with an egg wash and bake in a preheated oven at 180 C for about 15-20 minutes or until golden. Brush them with butter as soon as they get out of the oven to keep them extra soft and infuse them with added flavour.
Then gently using a pair of small sharp scissors, snip the strings and carefully pull them off each bun. You will need to be extra gentle so as not to tear the bun apart as they tend to be really soft and delicate. (PIC 18)
Serve and enjoy!!